If you’re into trying creative nail art at home, then you’ll fall in love with Blooming Gel. . It’s a clear polish that lets you apply colored gel polish over it, and the colors naturally spread across the nail. The way the colors blend is incredibly smooth—your designs flow evenly without needing to be perfect. Using a Flat Brush, Detail, or Fine Liner creates different results, while a double-sided Dotting Tool gives added texture. I like to work on one finger at a time to stay in control. The gel continues to spread until it’s cured under a lamp, which usually takes just a few seconds. My best tip—once you’re happy with the look, flash cure each nail for a few seconds, then fully cure the whole hand for about 60 seconds so it sets completely.
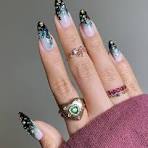
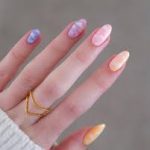
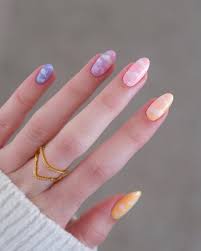
With Blooming Gel, the styles you can create are endless. Think tie-dye, marble, roses, flowers, aura nails, and even a wild crocodile look. Each one brings a unique effect with that soft, fluid finish. Whether you’re going for cute, professional, or artistic vibes, this gel gives your mani that high-end salon-quality feel. I’ve found so much inspo from Pinterest, social media, and trending boards—you’ll never run out of ideas. You don’t have to be a pro or super tech-skilled to get it right either. With a few quality products, some smart tips, and the right tools, you’ll get amazing results. I recently grabbed a starter kit online with free delivery, and it completely got me started on this fun DIY nail journey. The key is knowing when your look is done and ready to be cured—just take your time, enjoy the process, and do what works for you.
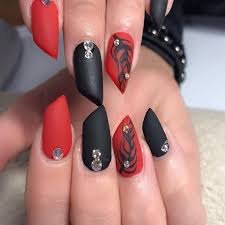
Creative Designs You Can Make
Can You Use Regular Polish With Blooming Gel?
If you’re diving into the world of blooming gel, here’s one thing I’ve learned from countless DIY attempts and salon visits—it’s not just about creativity, it’s about using the right products. A common question people ask is whether they can use regular polish with blooming gel, and the short answer is no. The formula of regular polish doesn’t allow it to spread or blend the way gel does. You won’t get the same watercolour effect, and it definitely won’t cure properly under an LED light. I tried once out of curiosity, but the result didn’t last and lacked that salon-quality finish everyone loves. Some even wonder, can gel nail polish air dry? The truth is, it can’t—gel needs light to cure, which is why LED or UV lamps are essential.
To get the best out of your mani, it’s essential to use gel polishes. When using a proper gel, not only does it enhance the longevity of the design, but it also ensures the finish looks clean and professional. The colors naturally spread and blend into stunning patterns. If you’re hoping for that dreamy watercolour effect that lasts longer, then it’s best to stick with gel products throughout the process. This combination creates a result that stands out and stays fresh well beyond a typical nail session.
How to Use Blooming Gel Polish for Beginners
Step 1: Prep Your Nails
Start with the prep. Begin by pushing back your cuticles and shaping your nails using a Half Moon Nail File. Next, grab a Buffer Block to remove any shine and oil from the nail plate. Use a Lint-Free Wipe soaked in Prep solution to clean the surface and prepare for gel application.
Step 2: Apply Base Coat
Now, apply a layer of Mylee Base Coat. Make sure it covers the nail evenly. Cure it under a Convex LED Lamp for 60 seconds, or 120 if you’re using a UV lamp. This sets the perfect base for color and art.
Step 3: Add Your Base Colour
Pick your chosen colour and apply it over the cured base coat. Cure again before moving forward.
Step 4: Apply Blooming Gel & Create Your Art
Now apply a thin layer of blooming gel without curing it. Use a Dotting Tool or an art brush to make dots or strokes with gel polish. Watch as the color disperses and creates a flowing effect on your nail.
Step 5: Add More Dimension
To intensify the design and give it a more dimensional feel, add more dots in darker or lighter shades over the first layer. Then cure it.
Step 6: Finish the Look
Finally, finish with a No Wipe Top Coat and cure it again. Your nail art will be sealed and glossy, ready to show off no matter which type of nails for fingers you’re rocking!
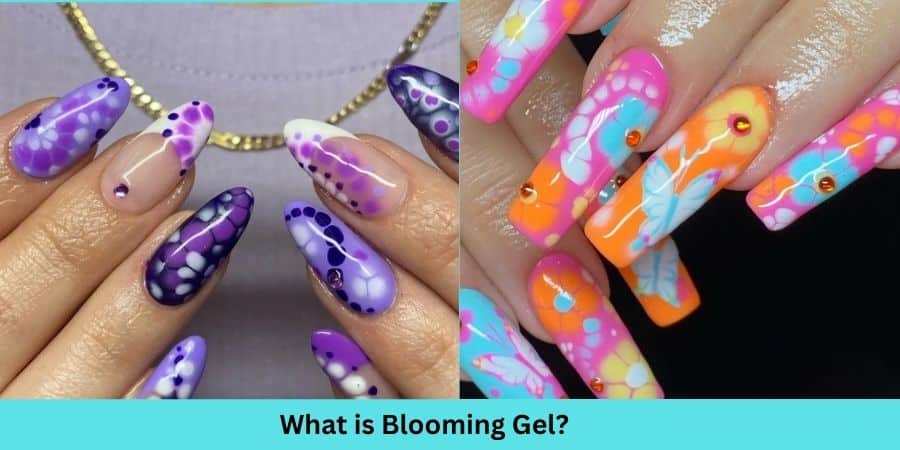
What is the purpose of blooming gel?
When I first tried blooming gel, I had no idea how much it would change the way I do nail art. This clear base gel is used before applying any color you want to bloom across the nail surface. It’s a great way to create those flowing, abstract patterns without needing a brush for every swirl. The polish spreads on the nail in such a soft and fluid motion, allowing your desired color to move naturally and form unique patterns. People often ask me, “What is hard gel nails?” and while both products are types of gel, blooming gel is used more for creative art, while hard gel is mainly for building structure.
What I love most is how it helps me mimic real textures like marble, natural stone, and even delicate watercolors. With blooming gel, I’ve made beautiful designs that resemble tie-dye, floral print, and dreamy gradients. Whether you’re using pastels or bold tones, this polish gives them life, letting each shade bloom in its own way. Honestly, once you get the hang of using blooming gel, the creative possibilities feel endless.
Do you cure blooming gel first?
When I first started experimenting with nail art, I was amazed by how blooming gel transformed simple patterns into something truly unique and beautiful. It’s not your regular top coat—it’s specially made to spread and blend gel colours in a smooth, blooming way. But a common question beginners ask is whether you should cure the blooming gel right away. The answer? Not quite yet. First, apply your gel colours—make sure you’ve already cured your base coat or colour. Once that’s done, paint a thin layer of Mylee Blooming Gel gently on top of the cured base coat.
Here’s the trick that changed my game: after placing a dot of each chosen gel colour into the blooming gel, I let it sit for about 10 to 30 seconds. During this time, the gel starts to flow and spread into a beautiful pattern—like watercolor. Once satisfied with the design, it’s time to cure it properly under a UV or LED lamp. Trust me, whether you’re going for subtle blends or striking marble effects, this method always creates something eye-catching. And if you’re exploring styles like what is soft gel nails, you’ll find blooming gel techniques add that extra touch of creativity and finesse, especially when paired with soft gel bases.
How to Dry Blooming Gel?
When working with Blooming Gel, getting the timing and technique just right can make a huge difference in the final design. From my own experience, after applying the blooming layer and creating the look I want on the nail, I always briefly place my hand under the lamp for just 5 seconds. This little trick helps to ensure the pattern doesn’t spread too much, keeping the details clean and sharp. It’s like freezing the art in place without fully setting it just yet. I’ve found that this partial cure gives you more control, especially when you’re experimenting with layered or multi-color effects.
Once I’ve finished the last finger, I go ahead and do a full 60 seconds under the lamp. This step is important because it completes the hardening process and locks everything in. Trust me, skipping or rushing this step can mess with your result and leave your design soft or uneven. That final cure is key to making sure your blooming manicure lasts and looks salon-perfect every time.
FAQ
Q1: What exactly is Blooming Gel used for?
A: Blooming Gel is a special type of nail gel that allows colors and patterns to naturally “bloom” or spread across the nail surface. It’s perfect for creating floral, watercolor, marble, or tie-dye effects without needing advanced nail art skills.
Q2: How do I apply Blooming Gel correctly?
A: First, apply a base coat and cure it. Then, apply a thin layer of Blooming Gel but don’t cure it right away. While it’s still wet, add drops or lines of colored gel polish to create your design. The colors will begin to spread naturally, giving you that unique look.
Q3: How long should I cure Blooming Gel?
A: After you’re happy with the design, briefly cure your hand under a lamp for 5 seconds to prevent it from spreading further. Once you’ve finished your last finger, do a full cure for 60 seconds to ensure complete hardening.
Q4: Can I use regular gel polish with Blooming Gel?
A: Yes, you can! Blooming Gel works well with most gel polishes. Just make sure your colored gels have a good consistency—not too thick or runny—for the best result.
Q5: Will my design move after curing?
A: No. Once you’ve cured it properly—first briefly, then for the full 60 seconds—your design will stay in place and won’t move or smudge.