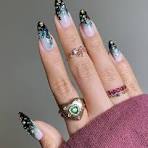
If you’re looking to achieve natural-looking nails with a subtle healthy-looking glow, the LONDONTOWN Kur Illuminating Nail Concealer is an excellent choice. This product acts like a beauty filter for your nails, creating a smooth, milky layer that beautifully reflects light. It works wonders by suppressing yellowness caused by various colour polishes, while also helping your nails look their best. Packed with botanical extracts, it promotes stronger nails and healthier-looking nails, making it ideal for those who want both style and care.
The Illuminating Nail Concealer is perfect for anyone who loves a nude manicure, as it is universal and suitable for any occasion. The product adds a soft shimmer to your nails, giving them an elegant yet effortless look. Its formula includes porcelain extract and optical brighteners, which work to reduce discoloration, resulting in a flawless finish every time. It’s an ideal choice for everyday wear and acts as a breathable treatment between manicures. No base coat is required, and applying a top coat afterward helps elongate wear time.

How to use Londontown Illuminating Nail Concealer?
To get the best results with Londontown Illuminating Nail Concealer, start by prepping your nails and fingers. It’s essential to begin with clean, dry nails. First, buff the surface to make sure it’s smooth and even. After that, use a polish remover to swipe away any leftover oils or residue. When the nails are prepped, apply 2-3 coats of the nail concealer. Let each layer dry for a few minutes in between. This ensures the product adheres well and gives a flawless finish.
Once you’ve applied your nail concealer, seal it with a top coat for added shine and protection. Personally, I prefer the Olive & June top coat, which gives an extra layer of gloss and moisturizing properties. It not only protects the concealer but also adds a beautiful, professional-looking finish, like you would get at a nail salon. The top coat enhances the gloss, making the nails appear even more polished and healthy. For the best results, always make sure each coat dries completely before applying the next, ensuring a smooth and long-lasting manicure. Apply the tip carefully for a salon-quality outcome.
What is a nail concealer good for?
A nail concealer is the perfect solution for achieving a flawless manicure. Whether you prefer a minimalist look or something more polished, just one or two coats of this product can work wonders. The beauty of this concealer lies in its ability to erase imperfections like yellowing, discoloration, and even ridges that often make nails look less than their best. The result is a smooth finish that leaves your nails looking healthy and glowing.
If you’re someone who’s tired of dull or tired nails, this concealer can restore their healthy-looking glow. The formula is designed to give a milky or sheer effect, depending on how much coverage you want. Whether you’re covering small imperfections or going for a more dramatic change, this product helps achieve the perfect balance. The glow it provides is natural, not too heavy, allowing your nails to still shine through with a restored and smooth appearance. This concealer can even make nails look like the most attractive nail color, enhancing the overall beauty of your hands.
For anyone looking to get rid of dullness or yellowing, this product is a game changer. It truly is the secret to an effortless, beautiful look that lasts, making your nails look naturally radiant and fresh.
How to Apply Concealer in 6 Simple Steps
Step 1: Start with a Clean Canvas
To ensure your concealer goes on smoothly, you need a fresh, clean base. Begin by cleansing your skin with a gentle foaming cleanser to remove impurities and prep your face. If you want to minimize the appearance of pores and make your concealer last longer, consider using a primer. This step is especially important as it creates the ideal canvas for a seamless application. A product like No7’s Airbrush Away Primer, infused with hyaluronic acid, will not only hydrate but also blur imperfections, leaving your skin looking radiant.
Step 2: Hydrate for a Flawless Look
Before applying concealer, make sure your skin is properly hydrated. Using a moisturizer helps lock in essential moisture, while an eye cream or eye serum can keep the delicate undereye area smooth and plump. Hydrating properly ensures that the concealer doesn’t sit in fine lines or emphasize dry patches, which can lead to a cakey appearance. I’ve learned from personal experience that skipping this step can result in uneven coverage, so don’t skip it!
Step 3: Choose the Right Concealer
When it comes to choosing the perfect concealer, make sure you’re selecting the correct shade for your skin tone. If you want to brighten up the undereye area, opt for a shade lighter than your natural skin tone. For blemishes or dark spots, use a concealer that matches your skin. A great tip is to apply the concealer in a triangle shape below your eyes to reduce the appearance of puffiness and dark circles, creating a more lifted and bright-eyed look. Also, if you’re heading out to a nail appointment and wondering, how much are French tip nails, you may want to factor in the overall look and style you’re aiming for, as these nails can complement a polished makeup look.
Step 4: Application Methods – Fingers or Sponge?
You can apply your concealer either with your fingers or a makeup sponge. If you’re aiming for a more natural finish, your fingers work great because the heat from your skin helps the product blend seamlessly. On the other hand, if you want high-coverage, using a damp makeup sponge is the way to go. Dampen it lightly, then apply and blend the concealer onto the skin with a dabbing motion, ensuring an even, seamless finish. It’s a simple yet effective technique I’ve always found helpful.
Step 5: Set It with Powder
Once your concealer is in place, it’s time to set it. Use a light dusting of setting powder to lock everything in place. This helps prevent creasing and keeps your concealer looking fresh throughout the day. If you have oily areas, such as the forehead or nose, you can apply a bit more powder in those zones for a mattified finish. I’ve found that this extra step makes all the difference in ensuring my makeup lasts all day.
Step 6: Check for Perfection
Once you’re done with the application, take a moment to check for any areas that may need a little more attention. If necessary, go back in with a touch of concealer to blur any remaining imperfections. Whether you’re covering blemishes or creating that lifted look under the eyes, this final step ensures that your complexion looks flawless and perfectly blended.