When I first started doing my nails at home, removing builder gel felt intimidating. I used to worry I’d damage my natural nails or cut them too short with nail clippers. After a few trial-and-error attempts, I realized how important it is to approach the process carefully. The first step I always take is trimming my long nails — but I’m super cautious not to go too close to the skin or cut unevenly. Learning how to work with your nails instead of against them is key.

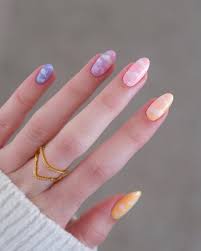
Before getting into the removal steps, it’s helpful to understand what is builder gel? It’s a type of thick, strengthening gel often used to create overlays or add structure to the natural nails, making them appear stronger and longer. Because of its durable nature, removing it properly is essential to avoid damage.
Over time, I found that using a fresh, sharp nail file to file back and forth gently made a huge difference. It does take some time, but you’ll notice progress as you remove the layer of gel slowly. I always check and dust off in between filing so I don’t overdo it.
Buff and Nourish
Once most of the builder gel is gone, it’s all about the buffing stage. I use a nail buffer to even out scratches or marks left from the previous step. Don’t worry if there’s a thin layer of gel left — it can actually help protect the natural nail as it grows out. I gently smooth with the white side, and sometimes I go in with a base coat, top coat, or even regular nail polish or gel polish to make my nails look fresh again.
The final step is where everything comes together — nourishing. I love using Glitterbels Cuticle Oil after the removal process. It helps to replenish the moisture that’s stripped during the removal, and keeps the cuticles hydrated and softens them. I’ve noticed it really promotes healthier nail growth and keeps them strong. It’s the perfect finishing touch to any nail routine. Just make sure you remove the gel safely and avoid peeling or getting too aggressive, because that’s how damaged nails happen. Always go for the right products — like pure acetone, cotton pads, or Mitty Polish off Soakies, which I prefer over aluminium foil because they’re reusable and better for the environment.
A low grit Mitty 100/100 grit nail file or electronic file like an e-file or e-drill also helps speed things up. I personally use the Mitty portable nail drill with a Smooth Top Barrel-Medium nail drill bit, and it’s been a game-changer. You can easily find these tools at professional salon retailers or hardware stores like Bunnings. Trust me, once you have the right tools and a little practice, removing builder gel at home becomes just another step in your self-care routine.
How to Remove Builder Gel at Home?
From my experience as someone who’s been through quite a few builder gel removals at home, having the right tools and technique can really make a difference. I start by using a low grit file, like a 100/100 one, to carefully file down as much of the gel and nail extension as possible. If you’re confident and trained, an e-file or e-drill with a Smooth Top Barrel-Medium bit can save time and effort—just make sure you’re gentle to avoid damaging the natural nail. I always keep my portable drilland handy for quicker results. Once most of the builder gel is removed, I move on to soak the nails.
To do that, I cut a cotton pad into 4 pieces, soak each one in pure acetone, and then place it over the fingernail. If you have Polish off Soakies, like I do, they’re a game-changer—they slide right on. If not, aluminum foil works too, though it’s a bit trickier and not very environmentally friendly. I leave them on for about 10 to 15 minutes, sometimes 20 depending on how stubborn the product is. After that, the gel softens, and I gently scrape it off with a cuticle pusher. If there’s still product left, just repeat step 1-3. Once everything is removed, I always buff the surface of my nails smooth and apply a rich cuticle oil—my go-to is 100% certified Australian organic Cuticle Juice. It leaves the nail’s surface healthy and prevents any post-removal dryness. This process might sound a bit detailed, but once you’ve done it a couple of times, it flows naturally.
Is Builder Gel Harder to Remove?
How to Get Builder Gel Out of Hair?
From personal experience, one of the easiest ways to remove builder gel from hair is by simply reaching for a spray bottle filled with water. I always fill mine halfway so it’s not too heavy to handle. Once I notice my hair has too much of the product in certain areas, I use the bottle to moisten those spots. The water really helps—it dilutes the gel enough to break it down, making it much easier to manage. You’ll see the product start to loosen almost immediately, especially if the gel is still soft.
There were times I didn’t have a spray bottle around, and honestly, using my hand to wet the hair worked just as well. Just scoop a bit of water in your hand and gently pat the sticky areas. The process feels very natural, and it gives you more control over which parts to focus on. While you’re dealing with builder gel, it’s also a good time to consider nail health—many people ask, is gel or acrylic better for weak nails? From my experience, builder gel can be a bit tough on the hair and nails alike, so gentle removal is key. Always opt for water and hand techniques if you can’t find tools, and never force it out, as that can damage your hair.
Short Answer (How to Remove Builder Gel )